

A Guide to Building your First Decentralized Website in 2023
Has Web 3.0 finally become mainstream?


Photo by Jainath Ponnala on Unsplash
Disclaimer: This article was first published by the author on Medium.
There are plenty of options available these days to help build and host your personal or brand website. Services such as Squarespace, Wordpress etc. have streamlined the whole process to an extent such that the average user no longer has to deal with technical challenges. The more tech-savvy folks often choose to self-host their website on a home server, or make use of GitHub pages. While all these approaches work quite well, they share a common theme of being centralized in nature. So, if the service gets interrupted, or your home network is down, your website also becomes unavailable. One way to overcome such a single point of failure is to make use of a decentralized network. Such technologies are often discussed under the umbrella of Web 3.0. This is where IPFS makes an entrance.
About IPFS
The InterPlanetary File System (IPFS) is a distributed system for storing and accessing data that could belong to websites, applications, individuals etc. By making it possible to download a file from multiple locations around the world, IPFS helps create a robust and fault-resistant data sharing network. In this article, I will show you how to deploy a personal website directly from your GitHub repository to IPFS. Moreover, we can attach the file hash (more on this below) to a custom domain name using the Ethereum Name Service (ENS).
Why IPFS URLs are different?
A traditional URL looks something like this: [https://github.com/vnegi10/CV_Hugo](https://github.com/vnegi10/CV_Hugo). Here the file is accessed by knowing its location (hosted on a particular GitHub server). On the other hand, an IPFS URL would look like this: [https://fleek.ipfs.io/ipfs/QmNeSyVvex3ReCdLW5FCRfWBLvc32iL5R6TyQMaNBaYJkD/](https://fleek.ipfs.io/ipfs/QmNeSyVvex3ReCdLW5FCRfWBLvc32iL5R6TyQMaNBaYJkD/). The last part is referred to as the content hash or content identifier (CID). Unlike the traditional URL, a file is accessed on IPFS by knowing its content. Since the unique address (CID) is created from the file itself, whenever the file is changed, the corresponding address also changes accordingly. It is important to note that addresses (thereby the content hash) cannot be moved or copied over across different versions of a file. Once a content hash has been generated, it will forever point to that specific version of the file.
IPFS only works when a group of people participates in the network. The content hash for your data needs to be copied over to different computers (or peers) around the world for it to be available 24/7. If that’s not the case, then your data might become unavailable after a certain period. To resolve such issues, we can make use of a pinning service such as Fleek. They run a lot of IPFS nodes, and allow users to pin data on these nodes for a fee (free for personal use).
All right, let’s break down the whole process of building and deploying our Web 3.0-powered website in multiple steps.
Step 1: Create a GitHub repository with website data
I made use of the Hugo framework, which is a fast static site generator written in Go. Installation for Linux is quite easy with the only prerequisites being Git and Go. Instructions for all the platforms can be found here. Once installed, you can create a Hugo site with a particular theme. Follow the instructions here. I chose the Anatole theme, for other options see here.
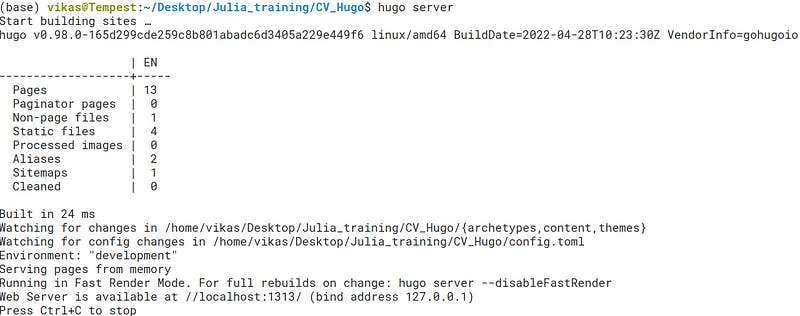
Running the hugo server command in the terminal (from within the website folder) builds and renders the website. It can be accessed via a browser window (localhost:1313/ in my case).
A typical directory structure would look like the following:
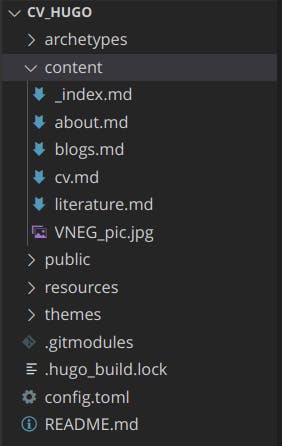
The content folder contains markdown files, which ultimately form the different pages of the website. The config.toml is used to set the configuration. It would depend on the theme used. You can visit my repository to learn how to set it up.
Step-2: Make an account on Fleek
Fleek is a professional service that allows us to connect our repository, add build settings, and deploy directly to IPFS. The “Basic” tier for personal accounts is currently free. We get a generous 3GB storage and 250 build minutes coupled with unlimited Git deployments. That’s usually enough for hosting static pages.
Step-3: Add build settings
Once the account is created, we can link the GitHub repository containing our website data to Fleek. Depending on the framework chosen, the build settings need to be configured to enable continuous deployment. All the steps are explained in good detail here.
The deployment from the main branch can be triggered manually. Else, it will happen automatically whenever changes are merged via a pull request. It should look similar to the following:
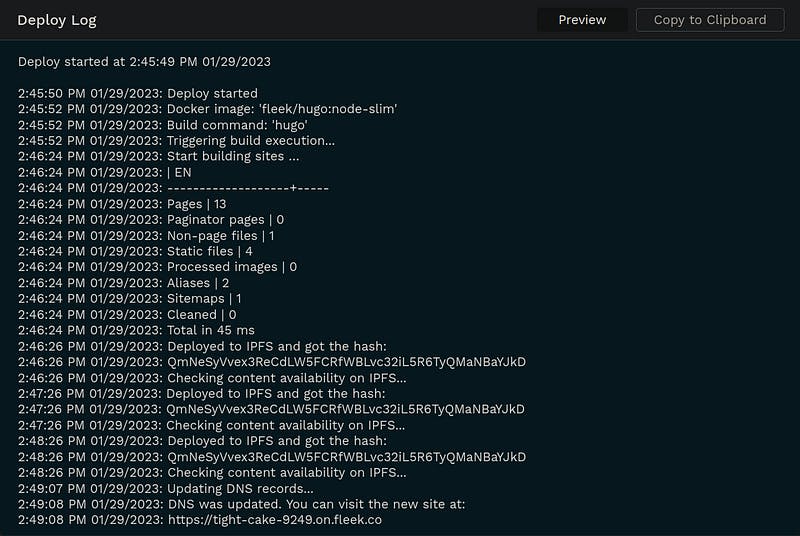
The build log should also be visible:
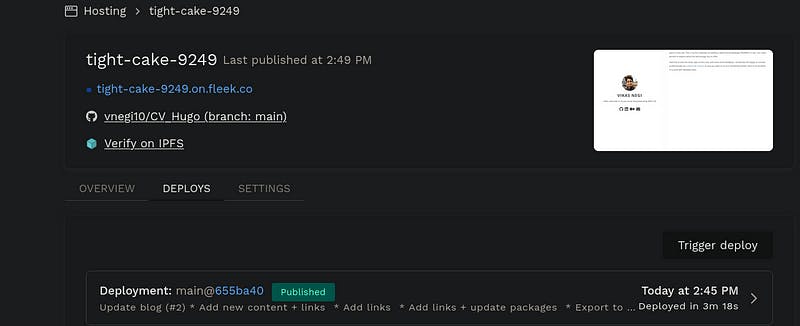
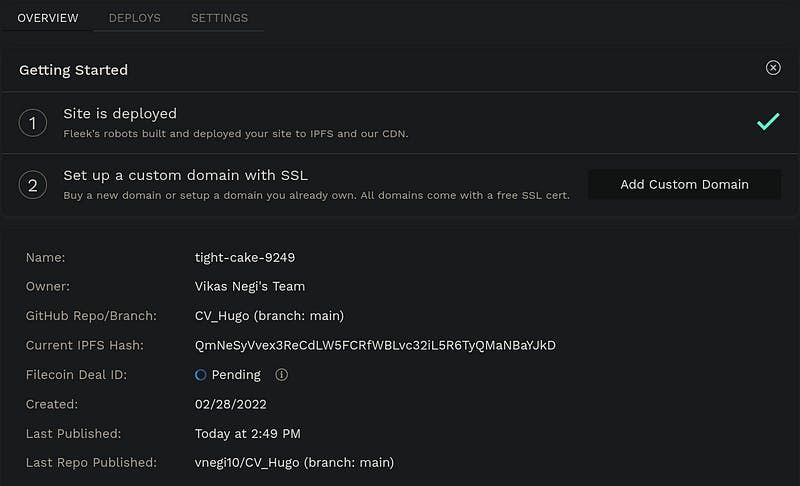
Once everything is done, the Current IPFS Hash should become available in the OVERVIEW tab:
The website can be accessed by clicking on the Verify on IPFS button which opens the link: [https://fleek.ipfs.io/ipfs/QmNeSyVvex3ReCdLW5FCRfWBLvc32iL5R6TyQMaNBaYJkD/](https://fleek.ipfs.io/ipfs/QmNeSyVvex3ReCdLW5FCRfWBLvc32iL5R6TyQMaNBaYJkD/) essentially acting as an IPFS gateway. Brave supports IPFS links natively (use ipfs://<add hash>), whereas you can use the IPFS browser extension to enable support for Chrome, Edge, Firefox and Opera.

At this point, our static website has been deployed to IPFS. But accessing it via the content hash is somewhat inconvenient. If you already own a domain name or wish to create one, follow the steps here to redirect it to the IPFS hash. And you are done! The next steps are therefore optional.
In the spirit of web3, it makes sense to use a decentralized name service to link the IPFS hash to a custom ENS domain name. Let me show you how to do that.
Step-4: Create a Coinbase wallet
To transact with the Ethereum network, you will need a valid Ethereum address with some ETH in it. The simplest way is to make use of the Coinbase Wallet on your phone. It’s available for all major platforms. I used the one for Android.
Step-5: Create an Ethereum Name Service (ENS) domain name
Click on the Connect button (top left) on the ENS home page, and select Coinbase Wallet.

Scan the code with the app on your phone, and you will be connected right away. Now all transactions from within ENS can be approved from the app.
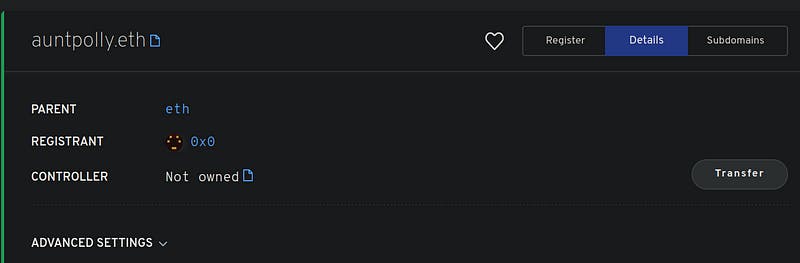
We can only register a name if it’s not owned by another address. For example, auntpolly.eth is available:
Click on Register to get options as shown below:

Go ahead and register for whatever duration you think is best. Longer duration will be more expensive. I registered my domain for 10 years since I intend to use it as my CV.
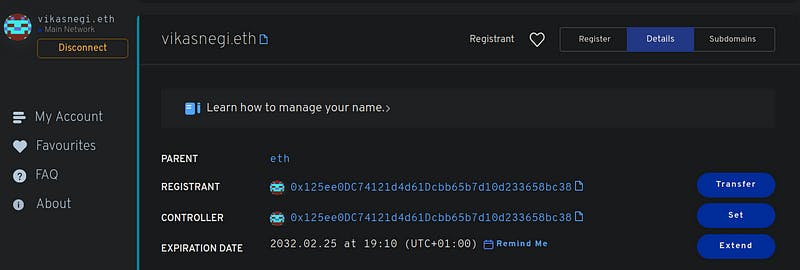
Once the transaction in the app is complete, the name will be registered to the ETH address. Go to My account, and add the ETH address as the controller if not done already.
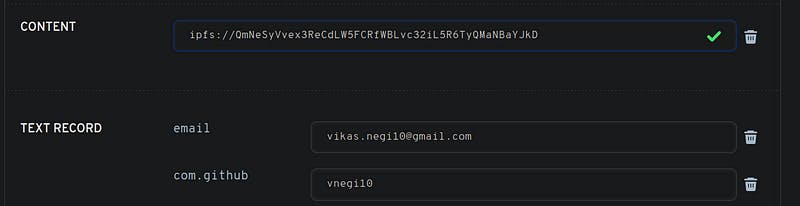
The IPFS hash (along with other details) can now be added to the records. Keep in mind that updating the records means carrying out a transaction on the ETH network. That will have a cost (paid in gas) depending on the network congestion. On Jan 29th 2023, I ended up paying ~ 1.71 $ worth of ETH to update the IPFS hash.
Click on save to initiate the transaction, and follow up on the app to approve. The transaction can also be tracked on Etherscan. If all goes okay, you should see something like this:

It will take a few minutes for the website to become visible. You should be able to now open the website link in any browser.
Conclusion
The process of deploying static websites on IPFS has become much easier over the last few years. Pinning services such as Fleek, Pinata etc. also provide Continuous Deployment tools (free for personal use), which is essential to keeping your website up-to-date. The whole process seems to work quite well.
However, I think it’s a bit too early to believe that the future of the decentralized web is already here. I still see the following limitations:
IPFS hosting works great with static pages, but they might not be suitable for use cases such as when real-time content needs to be delivered.
Updating the site content means that the IPFS hash is also regenerated. Using an ENS service might become costly in the long run, since we need to pay gas every time we update the ENS records. This could be particularly troublesome during periods of high network congestion.
Overall, I found this exercise very exciting! I hope you learned something new as well. Thank you for your time! Connect with me on LinkedIn, and don’t forget to visit my Web 3.0-powered website.